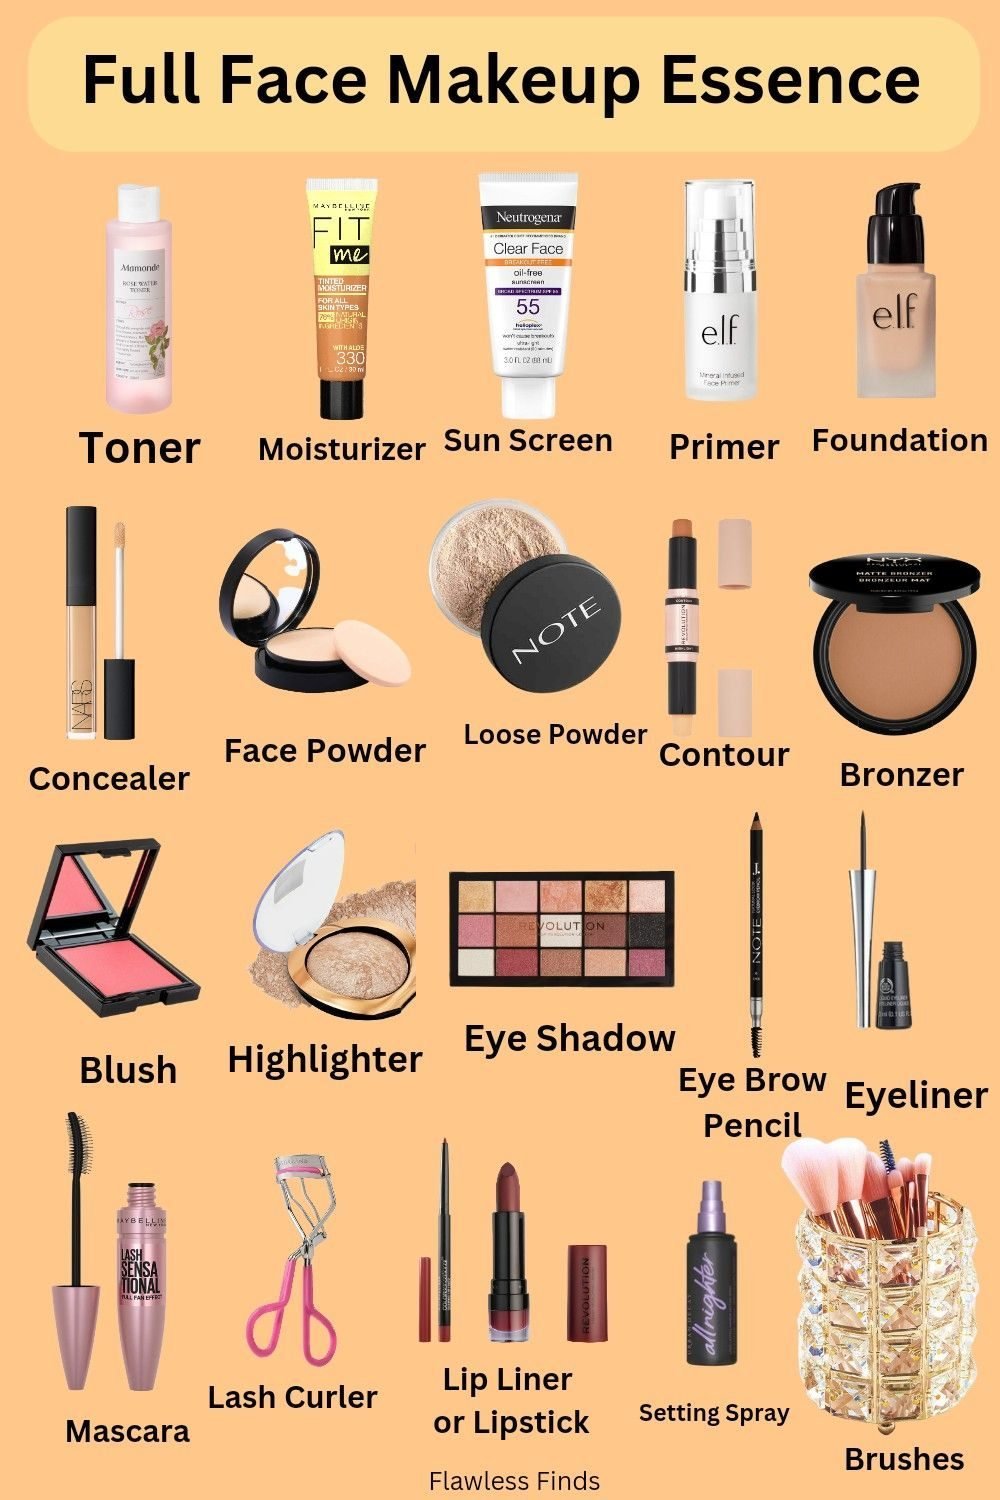
You watch a makeup tutorial and by the time the artist has applied primer, color corrector, foundation, concealer, setting powder, bronzer, blush, highlighter, brow pomade, eyeshadow primer, six eyeshadows, eyeliner, mascara, false lashes, lip liner, lipstick, gloss, and setting spray — you have already lost count at step three. The beauty industry makes makeup look complicated because complexity sells products.
The truth is you do not need most of those products for a polished everyday look. The most flattering makeup enhances your features rather than covering them. A five-minute routine with four or five well-chosen products produces a result that looks like you — just a slightly more rested, put-together version.
This guide strips away the noise and covers what actually matters: the essential products, the right tools, step-by-step application techniques for beginners, and how to build a routine that suits your face, your schedule, and your budget.
The Essential Product Kit
Start with six products. This is the minimum viable makeup kit — enough for a complete, natural everyday look without overwhelming your bathroom counter or your budget.
1. Tinted moisturizer or BB cream: Lighter than foundation, harder to mess up. It evens out skin tone while letting your natural skin show through. Choose one with SPF 30+ for added sun protection. Apply with fingers or a damp beauty sponge for a natural finish. If you have oily skin, look for "matte" or "oil-free" on the label.
2. Concealer: For under-eyes, blemishes, and redness around the nose. Choose a shade that matches your foundation for blemishes, or one shade lighter for under-eyes. Creamy, blendable formulas work best for beginners — they are harder to mess up than high-coverage, fast-drying concealers.
3. Mascara: The single most impactful product in your kit. Curling your lashes and applying mascara opens up your eyes and makes you look more awake in seconds. Black or dark brown are the most versatile shades. Waterproof formulas hold a curl better but are harder to remove. For everyday, a washable mascara is gentler on your lashes.
4. Brow gel: Tinted brow gel is the easiest way to groom and define brows. Brush upward and outward in short strokes. The tint fills in sparse areas subtly. Clear brow gel works if you have naturally full brows and just want to hold them in place. This single product does more for framing your face than any eyeshadow.
5. Cream blush: Cream formulas blend effortlessly with fingers and look like natural flush rather than powder sitting on top of skin. Tap onto the apples of your cheeks and blend upward toward your temples. Peach and rose shades work across most skin tones. A little goes a long way — start with a tiny dot and build up.
6. Tinted lip balm or lip stain: More forgiving than lipstick, more polished than bare lips. Tinted balm adds color while moisturizing. Lip stain lasts longer but requires precise application. A shade close to your natural lip color but slightly deeper is the most versatile choice.
That is it. Six products, five minutes, one complete look. As you get comfortable, you can add powder (to set concealer), bronzer (to add warmth), or eyeshadow (one neutral shade blended across the lid for depth). But these six are enough to look polished every single day.
Tools: Less Is More
You do not need a brush roll with twelve brushes. For the six-product kit above, you need exactly two tools: a damp beauty sponge (for concealer and cream blush blending) and a spoolie (for brows, often included with brow products). Everything else can be applied with clean fingers.
Fingers have advantages brushes cannot match: body heat softens cream products and helps them meld into skin. Makeup artists use fingers for cream blush and concealer as often as they use brushes. The key is clean hands and a light touch — pat and tap rather than rub and smear.
If you want brushes, start with three: a fluffy powder brush (for setting powder or bronzer if you add them later), a flat eyeshadow brush (for applying a single wash of color across the lid), and a blending brush (for softening edges). Affordable brands like Real Techniques and EcoTools offer quality brushes for $5-12 each.
Clean your brushes and sponge regularly — at least once a week. Dirty brushes harbor bacteria that cause breakouts. Wash with mild soap or brush cleaner, squeeze out excess water, reshape, and dry flat. A damp sponge should be squeezed out in a clean towel before each use.
Step-by-Step: The Five-Minute Routine
Start with clean, moisturized skin. Skincare prepares the canvas — makeup applies more smoothly and lasts longer on well-prepped skin. Wait 2-3 minutes after moisturizer before applying makeup to prevent pilling (clumping of products).
Step 1 (30 seconds): Base. Apply tinted moisturizer or BB cream. Squeeze a pea-sized amount onto your fingers, dot onto forehead, cheeks, nose, and chin, then blend outward and downward using your fingers or a damp sponge. Do not forget your jawline and blend down onto your neck slightly to avoid a visible line.
Step 2 (30 seconds): Conceal. Dot concealer under your eyes in a triangle shape (pointing downward) and on any blemishes. Blend with your ring finger or a damp sponge using gentle tapping motions. Do not rub — tapping covers better and disturbs less of your base. For under-eyes, blend close to the lash line to avoid a pale ring.
Step 3 (30 seconds): Cheeks. Smile to find the apples of your cheeks. Dab a tiny dot of cream blush on each apple, then blend upward toward your temples in tapping motions. The upward direction creates a lifting effect. If you applied too much, blend a little tinted moisturizer over it to tone it down.
Step 4 (30 seconds): Eyes and brows. Curl your lashes for 5-10 seconds at the base, then apply mascara in a zigzag motion from root to tip. One coat on the top lashes only is enough for a natural look. Comb through brows with tinted brow gel in short upward strokes.
Step 5 (30 seconds): Lips. Apply tinted lip balm. Blot with a tissue if you want a more subtle stain. If you want more precision, use a lip stain applied to the center of your lips and blended outward with your finger.
Total time: under 5 minutes. The result is a natural, enhanced version of you. No one should be able to tell you are wearing makeup — they should just think you look well-rested and put-together.
Matching Products to Your Skin Tone and Undertone
The most common mistake beginners make is choosing the wrong shade. Foundation and concealer that do not match your skin tone create a visible mask effect — the opposite of what good makeup should do.
Determine your undertone: Look at the veins on your inner wrist in natural light. Blue or purple veins = cool undertone (pink/red base). Green veins = warm undertone (yellow/golden base). Both blue and green = neutral undertone (mix of warm and cool). If you cannot decide, you are likely neutral — this is the most common undertone.
Foundation labels often indicate undertone: "cool" / "rose" / "porcelain" = cool. "warm" / "golden" / "sand" = warm. "neutral" / "beige" / "natural" = neutral. Test shades on your jawline in natural light. The correct shade disappears into your skin without a line of demarcation.
For concealer, you may need two shades: one matching your foundation (for blemishes) and one shade lighter (for under-eyes). A single shade that sits between the two is the practical compromise — match your foundation for concealer placement, and it will be close enough for under-eyes if you blend well.
Blush and lip colors look different on different skin tones. As a general rule: fair skin looks good with soft pinks and peaches. Medium skin suits rose, mauve, and coral. Dark skin pops with berry, brick, and deep plum. These are guidelines, not rules — wear whatever colors make you feel confident.
Common Beginner Mistakes
1. Too much product: More makeup does not equal better results. Heavy foundation settles into fine lines and looks cakey. Concealer swiped in thick layers creases under the eyes. Start with a small amount and build up gradually. You can always add more, but removing excess is difficult without starting over.
2. Wrong shade: Foundation that is too dark creates a mask-like effect. Foundation that is too light looks ashy. Concealer that is too light under the eyes creates reverse raccoon eyes. Always test in natural light and blend down your jawline and neck.
3. Harsh lines: Blending is the most important technique in makeup. Any visible line where product ends and skin begins looks unnatural. Blend edges thoroughly — at the jawline, hairlines, and eyeshadow edges. A fluffy brush or clean sponge can soften harsh lines in seconds.
4. Overlooking brows: Framing the face properly changes everything. Well-groomed brows lift the entire face and create structure. Even a quick brush with clear brow gel makes a noticeable difference. Avoid the mistake of over-tweezing — natural, full brows are more youthful and versatile.
5. Sleeping in makeup: The most damaging habit for your skin. Makeup traps oil, bacteria, and environmental pollutants against your skin overnight, causing breakouts, clogged pores, and accelerated aging. Always remove makeup before bed — a micellar water or cleansing balm followed by your regular cleanser takes under two minutes but saves your skin years of damage.
Makeup should be fun, not stressful. The goal is not to look like a different person — it is to look like the best version of yourself. Start with the minimal kit, practice each step, and add products only when you feel limited by your current routine. Your makeup skills will improve faster than you expect. For product reviews, technique tutorials, and recommendations for every skin type, budget, and look, visit Glow Guide's Makeup Section.